Wednesday 24 December 2014

Merry Christmas!

And to wish you all a very happy Christmas, I'm sharing with you the card I made for my husband Mark. As you may know, he is passionate about growing chillies, so much so that the fairy lights on our Christmas tree are chilli shaped! So I decided to make him a chilli-themed Christmas card. I searched high and low for a chilli rubber stamp, but couldn't find one that is currently available in the UK. My search for a suitable digi was almost as fruitless - I found a few, but nothing that spoke to me, so in the end I decided to draw and colour my own.

As I couldn't rely on myself to draw several identical ones, I scanned the one I'd drawn and pasted it several times over on to one page, along with a suitable greeting, then cut out the images and greeting to make the card.


I'm sharing this with CAS on Sunday challenge #49 - Christmas

Another House Mouse card

.. and another visit to the Snippets Playground with the other images from the House Mouse stamp sheet I was playing with yesterday. The beauty of this image is that you can engineer your image  to match whatever papers and card you have to hand, by colouring in the balloons to match. As I'm a very inexperienced colourer (should that be colourist, or is that the person who dyes your hair?) and it is the first time I've used the stamp, I used the suggested colouring from the guide sheet, after all I have so many snippets I could probably match up with anything!


Tuesday 23 December 2014

Sorting out the snippets

Yesterday, my five year old granddaughter, who loves crafting with me, came over for the day. She was feeling poorly and not really in the mood for crafting, but I remembered how when my own gran looked after me when I felt poorly, helping her to sort out her button tin always made me feel better.  So I suggested to Lara that she might help me to sort out the two bags of offcuts of ribbon and lace, and odds and ends of embellishments, that normally lurk under my craft table making me feel guilty for ignoring them.

She got really engrossed in winding ribbons into neat coils, and sorting beads, buttons, brads and sequins into storage boxes (and set aside a few pretty bits to take home with her) and by the time everything was organised, felt revived enough to make signs for most of the door handles in the house.

This says "Do not disturb the sleep & Lara's workshop open"
Plus a few paper streamers for the Christmas tree


While she was beavering away creating her signs, I sat beside her and stamped some of the gorgeous House Mouse images using the stamps that I won on my first visit to the Snippets Playground and made a start on colouring them. Today I finished the colouring and found that as well as my lovely box of paper snippets, I had all sorts of other long-forgotten treasures to play with among my newly tidied ribbons and embellishments.

The patterned paper is left over from a project so long ago that I can't remember where it came from - it looks home printed, so I thought it might be from a CD, but I can't recall which or see it on any of my current library. The yellow paper I've used in the layering is the very last scrap from a pack of paper (well, it was sold as card but it's too flimsy for that) that I bought on Earlestown market the week my Dad died, so it's been in my snippets box for almost 15 years! All the trimmings and embellishments are "rediscoveries" from yesterday's clear-out

Thursday 18 December 2014

A Hot, Hot Christmas!

I said I wasn't going to make any more Christmas cards, didn't I? But then I remembered that I'd not made my card for this month's Unstampabelles challenge, which is Summer Fun, with the twist of making it a Southern Hemisphere Christmas Card.

I've spent days searching through my papers, toppers and CDs looking for something that brought to mind both Summer and Christmas, but couldn't find a single thing. So I turned to Google and did a search for "Free printable Australian Christmas Images". There were very few results, and a lot of them weren't relevant (how the heck did Google think I was going to be pleased with a photo of the Golden Gate Bridge?) but eventually I found this Aussie Santa, complete with corks on his hat, and a sleigh pulled by kangaroos. The resolution of the image is rather low, hence it's pixelated in places, and I'm not sure why the designer chose that rather odd shade of mauve for Santa's skin, but hey, it's an image and it was free, so who am I to complain?

The paper, border and hibiscus topper came from the pull-out section of an old issue of "Making Cards" magazine, and the greeting was a magazine freebie a couple of Christmases ago.

I presume in Australia instead of sherry and mince pies for Santa, people leave sausages and beer? Maybe that explains why he's the colour he is!


Tuesday 16 December 2014

Sunflowers in December

Are you tired of making Christmas cards yet? For me, the time for making them is over and the time for sending and receiving them has arrived. This morning I've packed away all my Christmas crafting bits (although I've not put them far away, as my granddaughter is sure to want to use them when the school holidays start) and my thoughts have started turning to something more summery.

And what can be more summery than sunflowers? For this card I've used two papers from the CD "Linda Luckin Designs Background Papers" and a stamp designed by Linda to co-ordinate with the papers (sadly  the CD and stamp are no longer available).

I wanted to keep the layout simple, to make the most of the lovely papers, so I had a browse through my Pinterest "Sketches" board, where I pin any interesting looking sketches for possible future use, and came up with a nice bold sketch that worked well with the large pattern on  the papers.

 
This is my card for the latest challenge at CD Sundays  - Stamp it with sue-b

The Big Man at Cardz 4 Guyz

This week at Cardz 4 Guys the theme is "The Big Man" - Father Christmas (or Santa Claus, if you prefer to call him that, he's very obliging about answering to both names) and of course we want to see cards suitable for a man or boy.

This snowboarding Santa image from the CD "The Best of La Pashe 2014" would be great for a teenage boy, although I've given it a rather more "grown up" feel by reflecting the pine trees in the background of the image with a plethora of die cut pine boughs and cones cut and embossed with Spellbinders dies on my Grand Calibur.

Does it appeal to a man? Well my husband grabbed it to send to one of his friends almost before the glue was dry!


I'm joining in with
Crafty Creations Challenges - Something to Die For
The Male Room - Christmas
Cuttlebug Mania - Anything Christmas

Wednesday 10 December 2014

Broccoli "Water Chestnuts"

Yesterday I planned to make a Thai green curry of beef and broccoli. But when I got my ingredients together, the green curry paste was growing hairs and the broccoli had turned yellow. So a quick rethink was called for - I had mushrooms, spring onions and ginger in the fridge so I decided to make a quick stir-fry.

However, the thick stalk of the broccoli was still firm and healthy looking, so Mark wanted to use it (he's got a bit of a thing for broccoli stalks), and he peeled the outer skin off and sliced it into thick rounds.

Normally I would have parboiled the chunks of stalk, or anything that big and firm, before stir frying, but time was getting on so I decided to chuck them straight in. I stir fried them along with the spring onions for a couple of minutes, added the beef, stir fried again until it was browned, splashed in some wine and then stock and let it all cook for a few minutes (recipe after the photos) but I still expected the broccoli stalks to be too firm to eat.

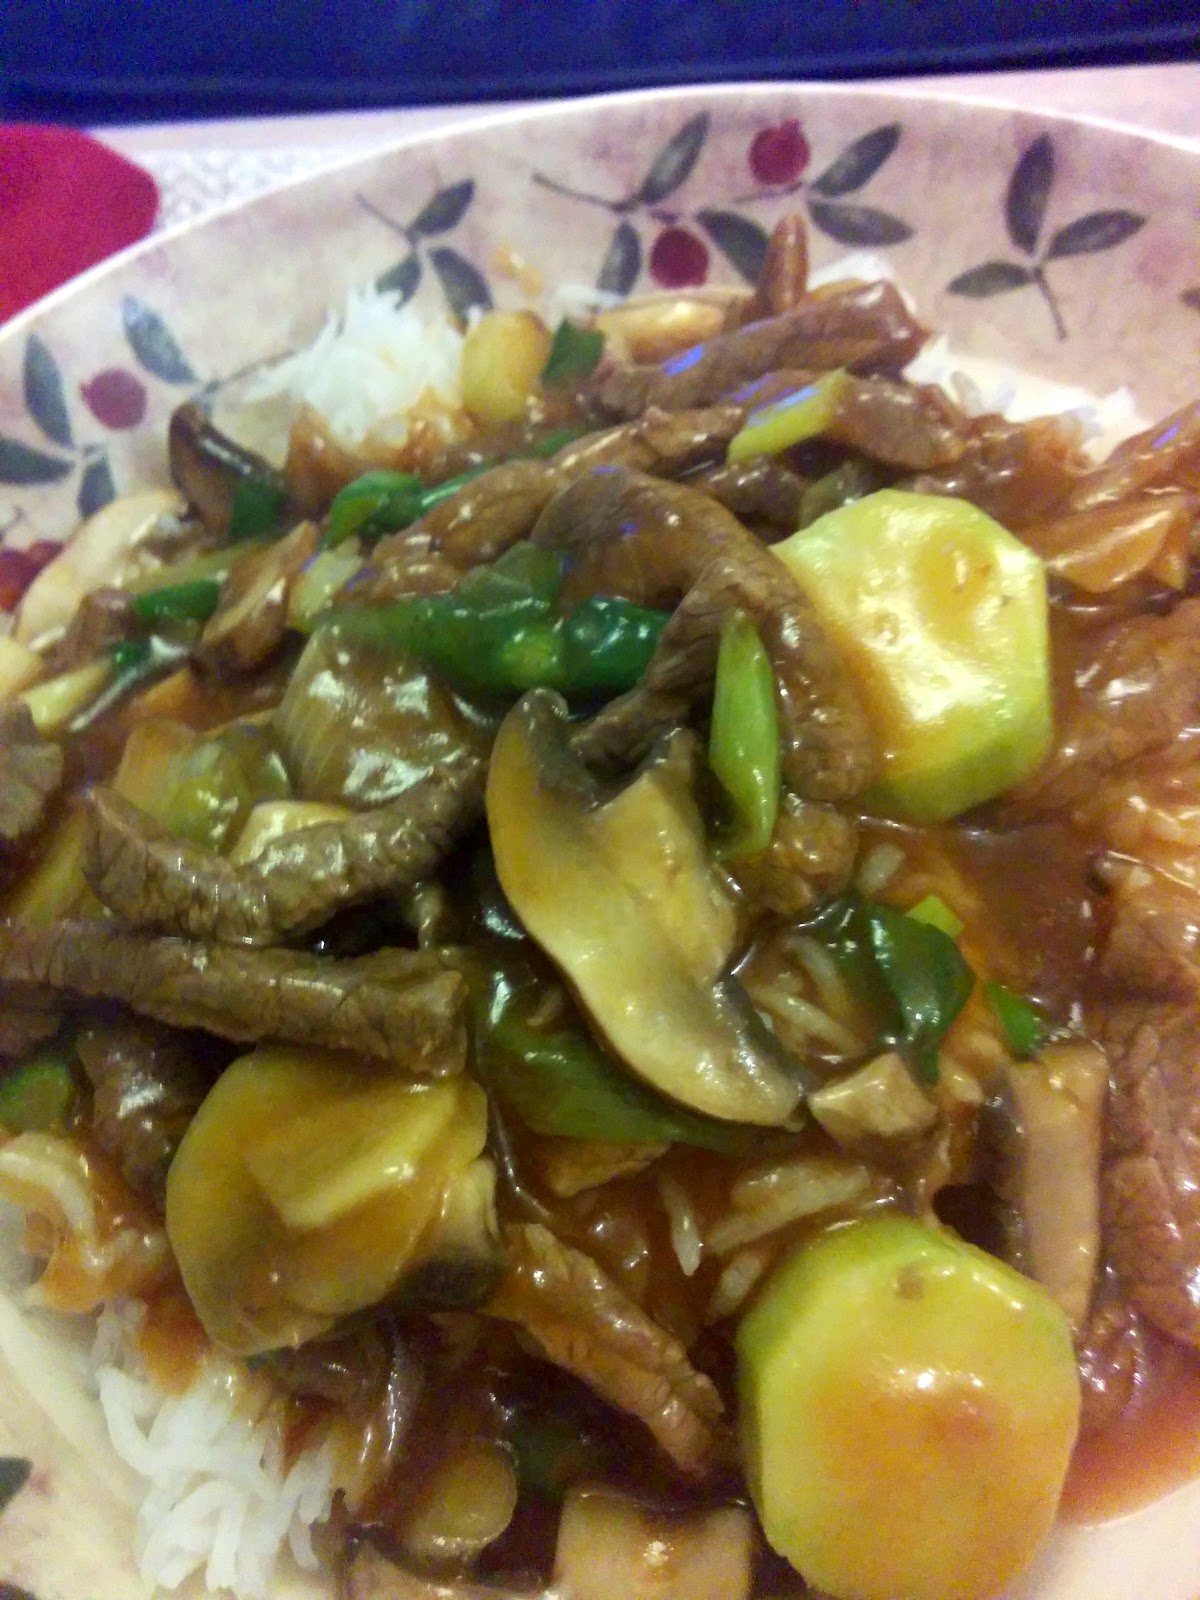
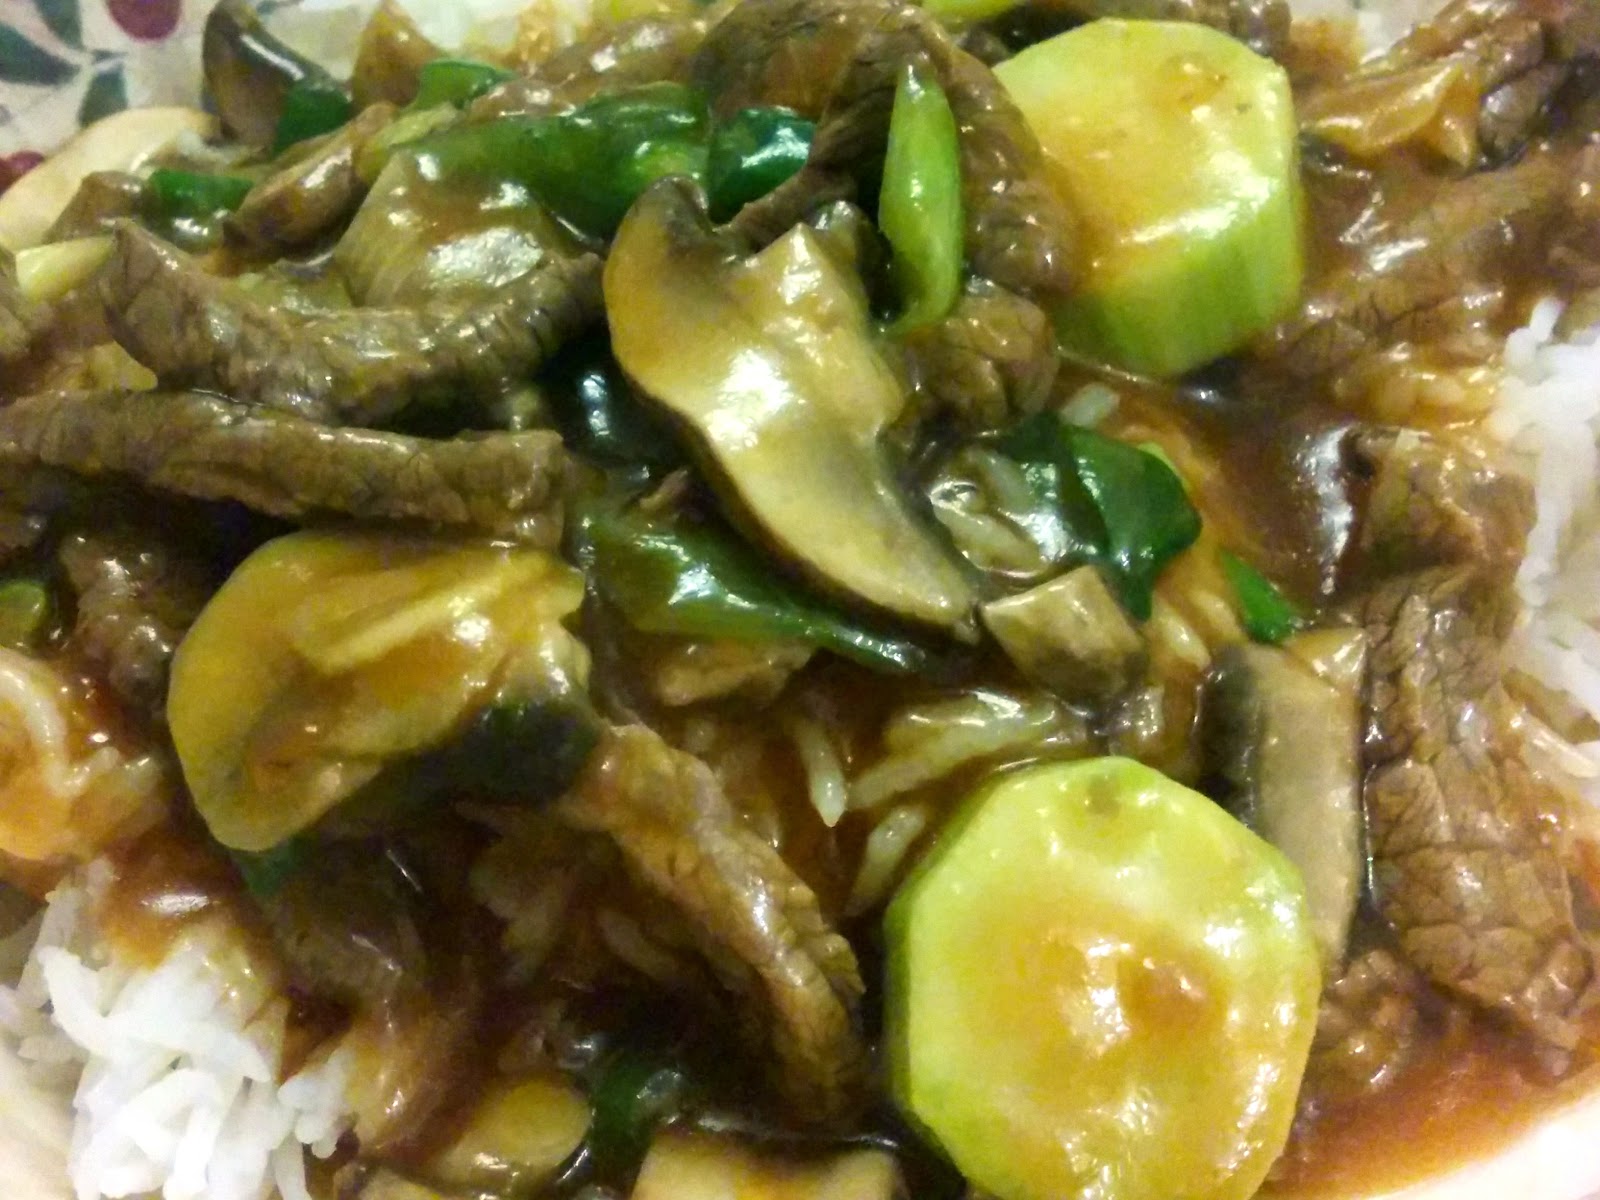
To my surprise, they came out exactly the texture of water chestnuts - and they were roughly the same size and shape too. I always feel water chestnuts don't have much flavour, but these "water chestnuts" had a lovely brassica tang that worked beautifully in the stir fry. A tin of water chestnuts is usually too much for two of us - the broccoli stalk was just the right amount, and all made from something that would otherwise have been thrown away!


Of course you could use them in any dish where water chestnuts are needed, but here's my recipe:

Stir fried beef with broccoli "water chestnuts" (serves 2)

150g frying steak, thinly sliced and marinated with 1 tsp cornflour, 1 tbs light soy sauce and a few drops of sesame oil for 10 minutes
6-8 spring onions, sliced into 1 cm diagonal pieces
small knob of root ginger, thinly sliced or shredded
"water chestnuts" made from 1-2 heads of broccoli
100g mushrooms, wiped and thinly sliced
1 tbs peanut or sunflower oil
200ml beef stock
1 tbs light soy sauce
1 tbs Chinese cooking wine or dry sherry
1 rounded tsp cornflour, blended with a little of the stock

Heat the oil in a wok and stir fry the spring onions, ginger and "water chestnuts" together until the onions start to soften, then add the beef and fry until browned. Make sure the wok is very hot then throw in the wine - the sudden cloud of steam as it evaporates when it hits the pan will help the vegetables to cook through. Add the mushrooms and the soy sauce and mix well, then pour in the stock and cook for 2-3 minutes until the mushrooms are soft and cooked. Add the blended cornflour, stir until thickened and serve - I served it over Basmati rice.

Since my "water chestnuts" are effectively FREE and are made from something normally thrown away, as well as adding extra flavour and bulk to an already economical meal, I'm joining in with Credit Crunch Munch and the No Waste Food Challenge

Credit Crunch Munch

Credit Crunch Munch is hosted at Fuss Free Flavours and Fab Food 4 All

The No Waste Food Challenge is at Elizabeth's Kitchen Diary

no-waste-food-badge

Tuesday 9 December 2014

Unchained Melody

The current challenge at CD Sundays is "Song Titles". If you've ever seen the film, you'll know why this image makes me think of the song Unchained melody! I've used two La Pashe CDs for this card - the image is from the CD Flippin' Families but I didn't think the papers on the CD that were intended to match the image really worked with it,  I much prefer the plaint-splattered paper which came from The Best of La Pashe 2014

Using a Hougie board to measure and score the diamond spring card made this a very quick and easy card to make - handy at this time of year!


Persiana by Sabrina Ghayour

Last week, Mark and I went to spend a night in Windsor - you can read about it on his blog - which will be forever memorable because of three things
  • the animated lighting display on the walls of Windsor Castle
  • being served smoked salmon with lemon curd as a starter
  • buying a copy of Persiana by Sabrina Ghayour
We've always been fans of Middle Eastern food, especially since our holidays to Turkey, and this book is crammed with lovely recipes, most of which are very "accessible", ie they don't need a lot of obscure ingredients or complex processes. There's the occasional spoonful of pomegranate molasses, dried lime or sumac, all of which are gradually becoming mainstream thanks to the "Ottolenghi effect" but apart from those, almost all the ingredients are to be found in the larder of most keen cooks.

But I'm not going to launch into a book review here - our book isn't a review copy, it's our own copy, intended to spend hours in the kitchen with us, getting spice-stained and oil-drizzled as all good recipe books should, so I'm just going to share with you some photos of the dishes I cooked on the book's first excursion into the kitchen.

The menu was:
  • Lamb and Pistachio Patties
  • Tomato Bulgar Wheat
  • Turkish White Bean Salad
  • Fennel and Apple Salad with Dill and Pomegranate Seeds (only without the apple, as I'd run out, and with mint instead of dill  as neither of us likes dill very much)
  • Maneesh bread, which Mark made, and isn't in this book - you'll be able to read about it on his blog soon
It was a real feast for the eyes as well as the stomach, and we'll both be cooking many more dishes from the book.


Winter Critters at Cardz 4 Guyz

This week's Cardz 4 Guyz challenge is "Winter Critters" - and as always, the card needs to be suitable for a male.

Now I'm very averse to penguins on Christmas cards - after all, we all know that Santa Claus lives at the North Pole. But penguins live at the SOUTH Pole, where Christmas falls in what passes for summer! But I'll use the occasional penguin on a Christmas card, just as long as there isn't a polar bear on the same card! I see so many cards in the shops with both penguins and polar bears on them, and the only place the two can ever meet is in a zoo!

Anyway, rant over! The penguin on this card is a Craftwork Cards topper, one of the last toppers from a kit I bought a few years ago. As he is skiing, I decided to make a diagonal band on the card to give him something to ski down. I drew lines on to the paper to make sure I cut in exactly the right place to get the diagonal band to sit properly on the card. But I drew the lines on to the back of the paper, so they wouldn't show - and of course that meant when I turned it over, the angles were all exactly wrong and I now have a spare band that will only fit a portrait-oriented card, so you'll probably be seeing another diagonal band around here very soon.

The Merry Christmas paper on the band is from a bit that's been in my "Christmassy bits box" for so long I can't remember where I  got it from, and the snowy forest backing paper is the remains of a sheet I printed out from a CD several years ago - I think it was a Polkadoodles CD which I made the mistake of lending to somebody and never saw again.

I wouldn't usually add glitter and gems to a male card - but it's Christmas!!! And anyway, that penguin has such a sad face he needs some shiny things to cheer him up.


After my North/South pole rant, I really MUST share this at Winter Wonderland, where this week's challenge is North or South Pole
And as everything but the mirri card came out of my Christmas scraps box, I'm playing at the Snippets Playground
I'm also joining in with Animal Magic at Allsorts Challenge blog

Wednesday 3 December 2014

A vintage bauble

Last year, one of the craft magazines came with a freebie of a wooden die cut bauble. I think it was intended for doing some kind of decopatch with, as there were Christmassy patterned thin papers with it, but I didn't fancy doing that so I set it aside. And this year I dug it out and decided to see what I could do with it.

A rummage through my bits box came up with half a sheet of an Anna Griffin Christmas paper in cream and green, left over from a QVC kit a few years ago, and various scraps of plain card, lace and ribbon.

I covered the bauble on both sides with the patterned paper, then brushed all over it with something called "Opal Dust" which just turned up in the post unannounced about 10 years ago - it must have been a freebie from a craft mag. It's a kind of gluey substance that dries invisible, with tiny opal-like particles suspended in it. It gives anything it's applied to a very subtle pearly sheen that really doesn't show up in the photo, but should look lovely on the Christmas tree with the fairy lights glinting off it. When that was dry, I edged the whole shape with Forest Moss distress ink.

I didn't have any cream lace and the while looked a bit stark, so I dabbed that with the distress ink too before applying it round the equator of the bauble. Although I was only planning to fully decorate one side, I did everything so far on both sides of the bauble so that if it turns around on the tree it won't show the bare wood.

Next I die cut and embossed flowers, snowflakes to use as flower centres, pine cones and pine branches. I added gold glitter to the tips of the flower petals then arranged  then on one side of the bauble, finishing the flowers with a gold gem. Gold cord to hang the bauble and a cream and gold ribbon bow made the finishing touches.


I'm sharing this with:
Craft Room Challenge - Christmas Decorations - No cards
Winter Wonderland - Dies and punches
and of course the Snippets Playground at Pixie's Crafty Workshop

Wishing you a Grumpy Christmas!

My December DT post for La Pashe features a decoupage design from the hilarious "The Grumps" range, available on the new CD The Best of La Pashe 2014 as well as an individual download. The backing papers are also from the CD.

I think The Grumps are set to become as popular as The Wrinklies, they are ideal for sending to people who prefer humorous cards, and many of the designs are absolutely perfect for men's cards. Some of them are Christmassy, like this one, but there are designs suitable for all occasions, or indeed "just because..."

The greeting I have used on the inside is from a La Pashe  Easy-Peely sentiments sheet.


Tuesday 2 December 2014

Your Favourite Christmas Colour Combo at Cardz 4 Guyz

We're into December now and as far as Christmas card making goes, on the home straight. Have you made all yours yet? Well here's an incentive to make one more - this week's Cardz 4 Guyz challenge is Your Favourite Christmas Colour Combo. We'd love to see your cards - as long as they are suitable for a male, of course. Why not pop over to Cardz 4 Guyz and see what the other DT members have come up with?

I had to think long and hard - I love so many colour combinations that I don't really have a favourite. But red and white is a classic at Christmas (although I believe we have the Coca Cola company to thank for the colours of Santa's outfit!) and I thought keeping to just those colours would help to give the card a masculine feel. Plus a lot of the top football clubs play in red and white, so it's a colour combo a lot of men are very happy with!

I had some red and white ribbon that went perfectly with my deep red card. Oddly enough on the photo, it appears to be a lot darker than the card. You can see the true colour of the ribbon on the knot just below the greeting.

When using ribbon on a card for men, here are some suggestions to help prevent it looking too feminine:

  • Obviously, choose "manly" colours and styles - nothing printed with pink butterflies, for example!
  • Choose matte rather than shiny, and chunky rather than delicate. Grosgrain works beautifully - organza is very hard to give a masculine appearance to!
  • Knots look less feminine than bows.
  • Keep it simple - straight lines and flat finishes, not frills, pleats and rosettes.
The snowflakes were cut with a Spellbinders set plus a Die-sire die that came free with a magazine. The medium sized one from the Spellbinders set is a real PIG to get out of the die! Even with waxed paper, or wiping the die with an anti static cloth (ie a tumble drier softener sheet) I usually have to have three or four attempts before I manage to get one out intact. The stamp is also a magazine freebie. I decided to finish the snowflakes off with pearls - not a very masculine touch but I thought it made an interesting change from Candi. And anyway, if a man can't get in touch with his feminine side at Christmas, when can he?
 

I'm sharing this with the following challenges:
 
The Male Room - Masculine Ribbon 
Suzy Bee's Bloomin' Challenge - ATG with a twist - Keep It Simple  
Completely Christmas - ATG with a Twist - Something beginning with S (Snowflakes) 
Just Us Girls - Anything Goes  
Winter Wonderland - Dies and Punches

Monday 1 December 2014

In memory of a very special lady

Yesterday I had some very sad news, a lovely lady called Steph Axtell passed away. Although I'd never met her, she'd been a good online friend for around 15 years, since I first got online. We shared two hobbies, through our loves of competitions and of craft, and I've mentioned her on here before, when she sent me a wonderful birthday gift of a collection of hand made postcards to use for competition entries. You can see my photos of it here.

Steph didn't have a blog, but many of my comping friends knew her, and I believe she was active on some craft forums so some of my crafting friends may have known her too.

I thought the best tribute to somebody who had so many online friends was to make a card to send to her family and share it online where as many of her friends as possible might get to see it, so here it is. I used die cuts as Steph always loved die cutting, so it makes it that bit more personal. The background is Core-dinations card embossed with the Swiss Dots folder and lightly sanded. The greeting is an Anna Griffin stamp.

I'm sharing this with the current challenge at Addicted to CAS, which is Dots

Wednesday 26 November 2014

A CAS Christmas card

My goodness, I'm getting brave! I've chosen to make a CAS card when it isn't for a CAS type challenge!

I love the combination of silver and purple at Christmas, so I dug out some purple Core-dinations cardstock out of a long-forgotten stack and embossed it in the Grand Calibur with a Die-sire folder that came free with some magazine or other, then sanded it and matted it with silver. Then I added a sentiment which was the very last one on a sheet I've had for several years, a snowflake made with a die that came free with Docrafts magazine some months ago and Candi from my stash. It's worked pretty well for a card made out of next to nothing! I think it would make a good masculine card - I'd use a rather lighter, lilacy purple for a woman.


I'm sharing this with

Completely Christmas Challenge - Let's see some embossing
Clear it out challenge- Winter Wishes/Snowflake
Cuttlebug Challenge (my first visit) - a Snowflake and a sentiment
Crafty Creations Challenges - Embossing

Bringing Home the Mistletoe

If you want to b e kissed at Christmas, it's essential to have mistletoe isn't it? And these young ladies and their little dog have obviously been out to get some in readiness for decorating their home. I hope their mother didn't get too cross with them for climbing a tree to get it! The images and papers are from Joanna Sheen's Victorian Christmas CD


I'm joining in with

Crafty Hazelnut's Christmas Challenge - Getting Ready For Christmas
Ooh La La creations - Christmas

The Streets of London

The X-Cut London Build-a-Scene set is one of my most often used sets of dies. I really wish they would make them of other iconic skylines! Here I've just used one of the layers, with a Routmaster bus (I can't use the word "iconic" again so soon, can I?) to give a splash of colour.


Now I've added the photo, I can see the Big ben tower is leaning slightly to one side. Sorry about that!

This is my second "Black and White with a splash of Red" card for Make My Monday.

A Thank You card

This week, Addicted to Clean and Simple are celebrating their second birthday, and the challenge is a sketch.

I thought about making them a birthday card, but then I decided a Thank You card would be even better - thank you for all the great challenges, which have set me thinking even in fortnights when I haven't actually joined in. So here it is, a Thank You card for ATCAS


The sparkly effect on the heart is achieved by foiling a die-cut heart cut from deeply textured card with adhesive film covering it, and foiled with perfectly smooth red foil from FoilPlay. The foil picks up the texture of the card to give it a lovely sparkle finish, more subtle than using a glittered card. I'll bear that in mind for a masculine Valentines card in the spring!

Although I have another "Black and white with a splash of red" card coming along later, I'm also sharing this card with Make My Monday where that colour scheme is this week's challenge, and as this is a Thank You card I'm making my first ever visit to The Crafters Café where Thank You is the current challenge.

Tuesday 25 November 2014

Aged to Perfection

This week at Cardz 4 Guyz we want to see your Food or Drink themed cards - and as always, they need to be suitable for a male.

I'm sure lots of you will be thinking of Christmas feasting by now, but I thought I'd take the opportunity to use some of the lovely stamps that came with a recent issue of "Creative Stamping" magazine.

The base card is made from kraft card with the vine corner from the stamp sheet stamped in Versamark ink. The banner and words are also from the stamp sheet, and I used foam pads to keep it slightly raised from the main image. For this, I cut and embossed cream and purple card using Spellbinders "Labels eighteen" and very lightly sponged through the die onto the cream card using Antique Linen distress ink, before stamping and colouring the design.


I'm sharing this card with:

Allsorts Challenge blog - No design papers allowed
The Pink Elephant - Anything Goes
That Craft Place - Anything Goes

Monday 24 November 2014

Parting with an old favourite

When I bought this Hot Off The Press Christmas pad, probably a decade ago, a friend asked me if I'd used any of it and my answer was "Of course not, I haven't finished stroking it yet!". I'm sure you all know exactly what I mean, sometimes papers seem just too good to cut into. But cut into them I eventually did, and the pad that started off with around 150 sheets is now down to about a dozen uncut sheets and a large bundle of snippets. There are still a few of the printed acetate sentiments left, and I've combined one of those, mounted on white card, with a selection of the snippets and (shock, horror) one of the uncut sheets for the background.


I've used this week's sketch at Sketch Saturdays for the layout. I think the simple block design and the muted colours of paper give it a very masculine feel even though one of the papers is a chintz design.


All those snippets mean I'm playing at the Snippets Playground too (oh Blogger, why have you suddenly changed my font in the middle of a post?)  and with so much patterned paper, I'm also heading over to Crafty Hazelnut's Patterned Paper challenge
This week's challenge at Winter Wonderland is Let's Get Sentimental and at Ooh La La Creations it is Christmas  so I'm playing there too.

Jingle all the way

Last Christmas I got a pack of little tiny real bells, then couldn't think what to use them for, so they sprang to mind when I read that this week's challenge at Less is More is "Jingle all the way"

I did kick myself a bit though - the holes on the bells for threading the silver thread through are TINY, and I'm very short sighted and astigmatic. I ended up taking my specs off and holding each bell up to one eye with the other closed. Now you know why I seldom do any embroidery any more - threading a needle is nigh on impossible for me.

When things don't go according to plan

Hello again - I've got my new computer up and running and have lots of blogging to catch up on! And I'm going to start off with a card that simply would NOT go according to plan. The current Butterfly Challenge is "Paper Pieced Butterflies" and I decided to use this lovely big Monarch Butterfly stamp that I got from the USA many year ago. In my mind, it looked lovely, stamped onto three papers, cut out and pieced, and framed with swirls of black peel-offs that have been sitting in my stash for years.

I tamped it first onto a green patterned paper, then onto an orange/yellow/brown paper then onto one in shades of red, cutting out segments of the wing markings from the redder paper to piece onto the orange/yellow/brown one and piecing this onto the green background.  It looked fine as I was doing it, but now the card is finished, I don't think there is enough contrast between the two papers I've used for the butterfly.

Then on to the peel offs. Talk about a mind of their own! They seemed to be riddled with static electricity, and however much I tried to relax them, to hold them with two tools and to position them carefully, they went where THEY wanted to, and despite being called peel-offs, stuck resolutely to their chosen places and pulled the background paper off with them if I tried to move them. So my swirls are all over the place, and puckered in places too. Because that's how they insisted on placing  themselves! I did my best to cover the worst with some flowers, but I'm still not thrilled with the result. It's "not bad" but it's absolutely nothing like what I'd had in mind when I set out to make this!

Thursday 20 November 2014

The Great British Cookbook

Right about now, Mark and I will be arriving at Nottingham Castle for the launch party of a new e-book, The Great British Cookbook. Why will we be at the launch party? Well, we wrote one of the chapters of the book!

A few months ago we were invited to join in, initially just to contribute a few paragraphs. But our contribution grew, so enthusiastic were we, until we had produced a whole chapter, beautifully illustrated with a selection of Mark's photos. In fact one of his photos has made it to the front cover! If you are a reader of his blog, you'll probably recognise his style - that beautiful display of veg near the  bottom of the left hand column.


In our chapter, Mark concentrates on growing veg, of course, while my part is aimed at those who don't grow their own veg but would like to shop and cook seasonally and use the best of British produce. The rest of the book is crammed with recipes from top chefs  and food celebrities including many well known names like Rick Stein, Michael Caines, Sat Baines and Adam Simmonds, as well as chefs from top restaurants in every region of the country - in all, 200 chefs have contributed. There will also be profiles of some of Britain's great food producers, growers, suppliers and retailers.

We're very excited about having taken part in this project, especially as the aim of the book is to raise funds for two very deserving charities, Macmillan Cancer Support and Hospitality Action. You can read more about the book on the Great British Cookbook website where you can buy the book as a download for just £12.00. I believe it will also be available from Amazon, The Apple App Store and Google Play Store. Buying it is your chance to make a charity donation to two deserving causes AND get a fantastic recipe book in exchange for it! They are hoping to raise £200,000 by Christmas, and it would be wonderful to know that some of my blog readers contributed to that total!

I'll sign off for today with one of the out-takes from our photo session for the book....

Tuesday 18 November 2014

Christmas Stocking

This week at Cardz 4 Guyz  the theme is "Christmas Stocking"  - we'd love to see you join in! And don't forget that your card has to be suitable for a male, young or old.

I've used this super image from one of the topper sheets on the La Pashe CD "Christmas with the Wrinklies", along with background paper from the same CD. I made a fold-back card, adding die cut circles to the inside of the card to give somewhere to write. TIP: to line up the circles on the inside, so they were perfectly aligned with the topper when the card is closed, I applied adhesive to the back and then laid them FACE DOWN over the back of the front of the card, with the card open, then closed the card from the back.


I'm joining in for the first time at Fan-Tastic Tuesday where the theme is "Anything goes with a twist - Make it Male"
and also with Crafty Hazelnut's Christmas Challenge Extra - November